Tag Archive: Seattle


Alaska Yellow-Cedar II

Another post you say? And another  Alaska Yellow-Cedar? AKA Chamaecyparis nootkatensis? None other than 😉 Why would I quit after just one? And It wasn’t mine, after all. So while I in Seattle, I took a little trip to Bremerton to visit Dan Robinson, owner and curator of Elandan Gardens. I wanted to see if he had any more of these available and was pleased to find several of them to choose from, both in size and price. I walked right past the tree I eventually wound up with and only saw it when Dan caught up with us and picked it right off the ground and said, ‘I thought this is the one you wanted’. Indeed it was. I called ahead of my visit to make sure Dan would be there and indicated I was in the market for a small AK cedar. Let’s take a look at the tree as it arrived from its Seattle origin:

AK cedar 2


It was just a year ago I brought one of these into my garden, looking a lot like this–a really sexy, muscular trunk topped by long, lanky branches with rather coarse looking foliage. I have learned from styling the first tree that with careful pruning and wiring and then cutting new shoots, that the foliage ‘problem’ can be remedied. Another shot with the tree tilted slightly to the right and my camera lens cap in there for scale:

AK cedar 2


The lens cap is 2″ in diameter, which is roughly the same as the trunk. You’ll soon see other views of the tree but this choice for the front is the one that ‘talks’ to me. When I finished my ‘before’ photos, I hoisted her up on the bench and started cleaning the trunk of old, flaky bark. In the process, I discovered a long, thick branch near the top of the tree I hadn’t planned on using for anything:

AK cedar 2


A closer  shot for you to see:

AK cedar 2


My knee-jerk reaction to such an offensive branch as this was to cut it off leaving a stub for a ‘jin’ or broken branch. And since I was going to cut it off anyway, I tested it for flexibility. If it broke or snapped, who cares? I was pleasantly surprised that it was quite limber and flexible–a good sign for the rest of the branches I planned to keep…and then, while I had it down in the lower position, a thought occurred to keep that branch as a ‘safety branch’, a kind of insurance policy in case I messed up any of the other important branches I had planned to keep! And thus it was so; I kept it and used it to anchor another branch just as thick with some six gauge copper wire. The next photo shows the tree turned around to the ‘front’ again. Can you see the offending branch any more?

AK cedar 2


It’s there, I assure you–as a ‘back branch’ being used to give the tree a greater sense of depth. You can also see the larger branches have been wired and I also pruned out the really long branches I found emerging from areas on the trunk and larger branches in clusters. If I left all the branches in these clusters, they would eventually create an unsightly bulge or thickening and ruin the taper. That’s where I had to leave it for that day, as I had to mow the lawn before our first big November storm. The next photo is from the day after, and after several hours of wiring the finer branches:

AK cedar 2


All went fairly well and I only broke one branch that actually tore more than snapped. That’s what I like about this species is its toughness and resilience. I’m hoping that by styling it in the fall as opposed to winter as I did with the first one I worked, it will get a little ‘jump’ in the sometimes long process of going from raw material to a bonsai. I will keep this one on the ground as soon as freezing weather arrives and in an area of the garden that also has protection from wind. And like the last post, I’d like to leave you with a photo of some colorful mushrooms that sprouted from the base of one of my collected Hawthorns…enjoy!

Hawthorn/mushrooms

Skidaddle to Seattle

I really wrestled with the title for this post…skidaddle might be a word, but I think you know it means to go. And it rhymes with Seattle. So, there you go. I ran up to Seattle last weekend to deliver a tree to a client and work on another tree for the same client, visit Elandan Garden and attend a Puget Sound Bonsai Society meeting to catch a program they had featuring my friend Scott Elser. Seattle is so close to Portland and yet, so far. And I did drive there. It isn’t all that far, it’s just the traffic gets so congested once you hit Seattle. So I don’t make the trip that often but when I do it’s well worth it. And I’m happy to be back in Portland once again 😉

How about a picture of the tree I delivered?

AK yellow cedar


It’s back home in Seattle now after a tough year of being styled, re-potted and adjusting to its new life as a bonsai in a bonsai pot in just one year. It helped the raw material had a great root system and was able to take two insults in the same year. I usually take more time than this but the tree was really in need of a different pot and some regular fertilizing with organic fertilizer.

Next up is a series of photos of the initial styling I did of a Rocky Mountain juniper that was collected in Wyoming and was   showing sings of vigor telling that it could be styled. We look for long extension growth on the tips of branches indicating a robust state of health. Hopefully this can be seen in the first photo; I apologize for the lack of a good ‘before’ photo of the tree, so we have to work with what we have:

RMJ


I’ve also started cleaning up the live vein on the tree, which was very obvious and easy to find. This tree has a nice clockwise twist that will be apparent in the following photos

RMJ


More cleaning the live vein. If you look at the base of the trunk you can see the old soil level. There were no roots that high, so I removed the top 2″ of pumice to get a better sense of where the ‘front’ of the tree should be. There was also moss growing right up against the deadwood which will eventually lead to rot even with a resinous tree like a Rocky Mountain juniper.

RMJ


More cleaning. I see all kinds of fancy gravers for doing this but I find my old Stanley wood chisel works just fine. I also use it for silk carving deadwood. A handy tool to have!

RMJ


A shot from the left side of the tree a little toward the back of the tree. It shows the spiral twist the live vein has in conjunction with the old part of the trunk that died long ago.

RMJ


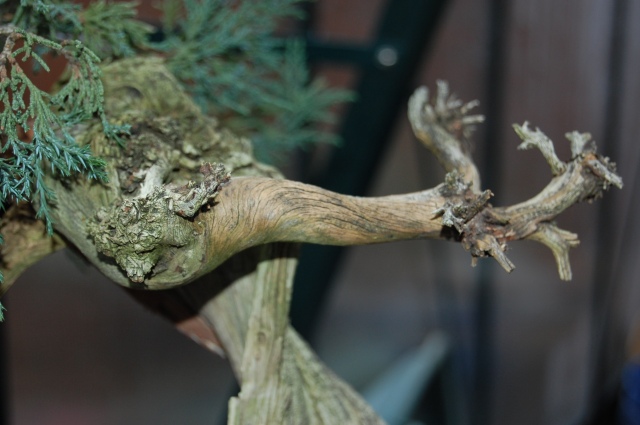
Detail of the jin, or dead branch, located top left of the tree. This branch indicates the environment was too harsh to the left side of the tree, so it reallocated resources to the right. Might it have been the wind? Too much sun? Who knows?

RMJ


The upper part of the trunk is as big around as an adult’s middle finger  and very, very stiff! I will need to bring it down and around with some very heavy gauge wire and if left unprotected, the wire would surely mar the bark. The branch will also probably tear when I when I apply full force, so I wrap wet raffia around the branch to hold things together as I ‘put the hurt’ on that stiff old branch.

RMJ


A shot from above showing the branch all wrapped up. I used 5 strands of raffia for this…the number of strands of raffia we use depends on how stiff the branch we need to bend will be. I have used anywhere from 3 strands to 6 depending on the situation. Junipers are generally stiffer than pines, so they require more strands.

RMJ


Stiff branches require heavy gauge wire, in this case, 4 gauge copper wire. This is looking in from the right side and down in. The branch we want to bend is anchored by the thick jin on the right. I will trim off the wire that’s hanging down after the branch is positioned where I want it.

RMJ


Once the upper portion of the trunk is bent down and twisted around clockwise, I begin to wire the first branch.

RMJ


A shot of the branch with me out of the way. The branch has been placed roughly into the position I want it to be, all that is left is fine wiring.

RMJ


We took a day off to visit Elandan Gardens in Bremerton and Monday morning, it was back at it! The first branch is now wired and I continued to move out and up the trunk from there.

RMJ


Concentration…

RMJ


Ta Da! Halfway through…


A shot of the tree from the right side to see the reduction in height. This is a result of bringing the trunk down plus bringing the smaller branchlets down and in towards the trunk.

RMJ


More wiring…

RMJ


Over on the right side of tree wiring  smaller branches.

RMJ


Sorting out the apex, or crown of the tree. Also some thinning and placement of branches on the right side of the tree.

RMJ


Closer to completion…

RMJ


How she looked when done in the greenhouse. If you look closely at the base of the trunk, you can see a black arrow drawn on the box to indicate the front of the tree. Also note the blocks placed under the left side of the box to indicate the desired planting position when the time comes. The tree will be kept in the greenhouse and foliage misted twice daily as part of the aftercare from styling. If we play our cards right, we might be able to pot it this spring. Rocky Mountain junipers growing in the Northwest are potted later than all other conifers, sometimes as late as June, but the best time is May.

RMJ


Time for a little levity…don’t mess with me 😉

RMJ


A parting shot outside the greenhouse before we went off to the meeting of the Puget Sound Bonsai Society…I drove back to Portland after the meeting to arrive home at 1 a.m. tired but happy to be home safe and sound. From the sound 😉