
Happy New Year to all! I thought I’d start 2013 off right with a new post to my blog. We’re getting a dose of winter in the Willamette Valley; the ground is finally frozen and there’s about an inch of ice on my rain barrels. I tend to go easy on my trees when water is frozen 😉
A few of you out there know that I like to plant trees on old shovel blades that have become useless when the wooden handle breaks just above the ferrule (those not in the know, a ferrule is the tube that secures the handle of a tool to the business end) I do have one shovel planting that has an intact handle and it’s kind of awkward to work on the tree…I prefer the broken handles. The tree that is the subject of today’s post is a plain old ordinary green mound juniper–Juniperus procumbens ‘nana’. I sourced it from Randy Knight of Oregon Bonsai, who donated it to our club’s raffle table. This tree was so unappealing not one member put a ticket in its bucket 😦 I had been caring for it in my yard for the club and couldn’t bear to see all the months of nursing it back to health go to waste. It was the perfect candidate for my plan!
One of the nice things about using material like this, is that one is not too precious with it and daring to take risks is the order of the day. I’m sorry I didn’t take any before pics of the planting or any during its creation. Having a blog is really good to motivate you to take better reference shots of your trees and what you do with them. On July 4th 2011, I decided it was time to try out my idea. This tree had a skinny little trunk with branches cascading over one side of its gallon size nursery pot. The only design I could see for it was a cascade style or a semi-cascade style–I would just have to see how it went. I never like to force myself into a rigid mind set when attempting something new like this.
The other two shovel plantings I have done were with the shovel blade-side up, the thinking here was that it makes a nice shallow tray to hold the tree’s roots. I had been thinking about trying one with the roots on the back-side of the shovel blade. So I took the tree out of its pot and discovered the reason why it wasn’t doing so well when I got it. It was still in its original peaty nursery mix and had been root-bound for a long time. So much so that the bottom 2/3 of the rootball was dead. I had fed it well with an organic pelletized fertilizer which encouraged roots on the surface of the pot–where we want them anyway. Since I didn’t have to worry about reducing a large root mass, my job was easy–shake off the fine, rotted peat soil and lay down a fresh layer of a pumice-based mix I like to use for rock plantings and plantings like this. I pulled the little tree’s trunk right up into the hollow ferrule and really wedged it in. The tree was going to be stable in its new home and I worked on mounding soil over the roots slightly and covered the whole thing with living green moss. I also wrapped the rootball with some ‘buddy’ tape, a parrafin wax tape that is used for grafting. The tape is supposed to dissolve in time, so I thought it would be perfect for this application. Things were going so well I decided to wire the branches as well. I kept the new planting on the back porch of my Bungalow-style house and it provided just the right amount of shading for the newly styled and potted tree. I also misted the foliage several times a day as the air is quite dry here in July and it happens to be one of our hottest months. It got up to 106* in July of 2009 in fact!
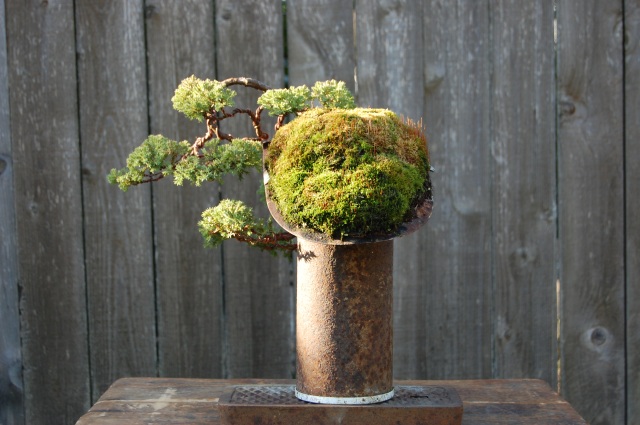
I took this first shot of the tree in October of 2012 after one growing season of resting with the wires off. Yes, it was necessary to de-wire this tree in the fall of 2011. The re-potting to the new home increased its vigor so much that the branches were swelling after 3 months of growth.


A slightly different angle
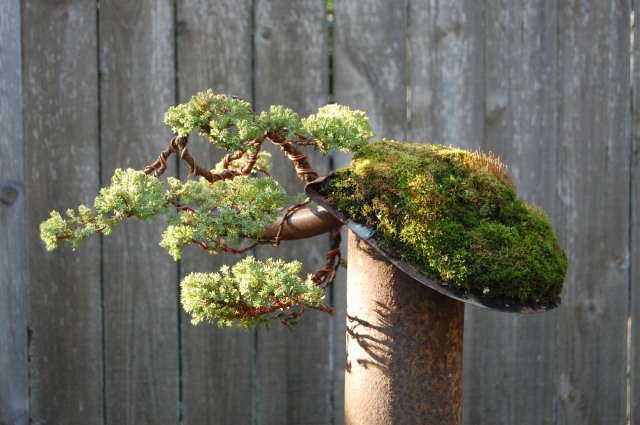
And so November rolled around, which is a good time for wiring junipers like this as the new growth has hardened off and the tree is beginning to shut sown a bit. Here is how the tree looked after an afternoon of wiring:

Some different views going around the tree:


left side

the back side
right side
close up

That’s all for now–hope you enjoyed the tree!

